Car Scanner provides you with the ability to record data received from a car for further evaluation or processing.
Recording data
In order to enable data recording, go to Data recording on the main screen and turn on the “Data recording” switch (enabled by default).
This can be done while Car Scanner is connected to the car, but I recommend doing it before connecting.
Before you begin, you need to understand a few simple rules:
- Car Scanner records only the data that is displayed on the screen.
Example: if you want to record engine load and engine RPM, set “Dashboard” or “Live data” to display them.
- In addition to the displayed data, the data that comes with the requested data is recorded too.
Example: when you request an oxygen sensor voltage, the answer from ECU always contains a short-term fuel trim (STFT). If you set Live data or Dashboard to show only oxygen sensor voltage on the screen, then you will see oxygen sensor voltage and short-term fuel trim in the saved file.
- If you set Car Scanner to display a parameter that depends on another parameter, then the output parameter, all parameters on which it depends, and all other parameters that have the same dependencies will be recorded.
Example: if you set Car Scanner to show “Vehicle speed”, then in the saved file you will get “Vehicle speed”, “Average speed” and “Total distance”.
- If you turned on the parameter “Always calculate and save fuel consumption”, then in addition to the above parameters, all parameters related to fuel consumption and all parameters on which the calculation of consumption depends will be recorded.
- The file with the record is saved in two cases: when you click on the “Disconnect” button and when you turn off the “Record data” option.
If you exit the program before disconnecting from the car or go to the “Data recording” section during recording, you will not find the file with the current recording there.
- Only data that has a numeric value is recorded. Data with a text value is not recorded.
Viewing recorded data
In order to view the recorded data, go to Data Recording and tap on the desired file.
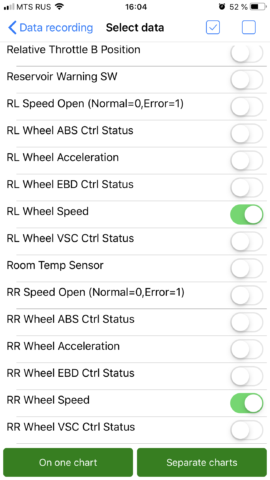
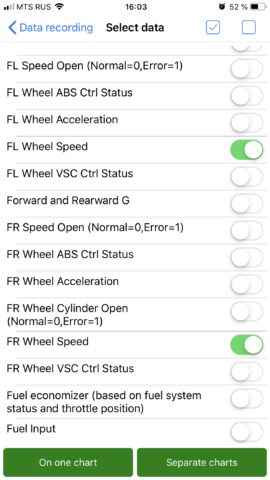
You will see a list of recorded parameters. Select the ones you want to display by ticking them.
You can choose one of two options for data presentation:
1. Display of each selected parameter on a separate chart
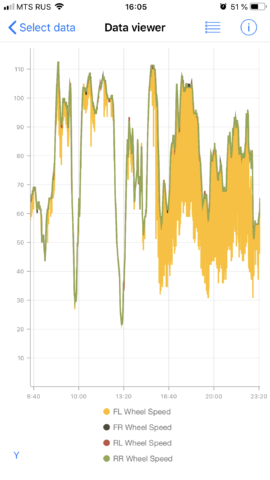
2. Display all selected parameters in the general graph.
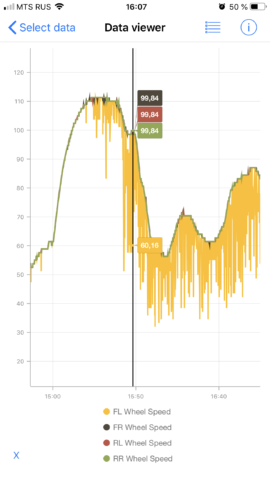
When viewing, you can scale and scroll through the graphs. In the mode of the combined graph, you can select the zoom mode: along the X axis, along the Y axis, or along both axes simultaneously.
If you hold your finger on the chart, you will see the current value of the indicator at the selected point.
Export Recorded Data
You can export the recorded data in order to open it on a PC or Mac, or to share it with other Car Scanner users.
Export is possible in two formats: CSV and BRC.
CSV is the simplest format of spreadsheets and you can open it with a notepad or MS Excel or similar other apps.
BRC is an internal data storage format. It can only be read by the Car Scanner program.
The export process is different for iOS and Android versions!
Method number 1 for iOS:
1) Swipe from right to left on the file that you want to export, click “More” and “Share”
2) Select the format you want: CSV or BRC
3) Select the app to export. You can use the mail client, instant messengers, cloud storage (Dropbox, etc.)
Method number 2 for iOS (you need a Mac or PC, iTunes, export is possible only in BRC format):
1) Connect your iPhone / iPad to a Mac or PC and wait for it to appear in iTunes
2) Click on the connected device in iTunes and go to “Shared Files”
3) Select the program Car Scanner
4) Find the file you need in the list and simply drag it to the desktop or to any other folder on your Mac or PC.
Read more about working with the “Shared Files” feature here: https://support.apple.com/HT201301
Method number 1 for Android:
1) Hold your finger on the file you want to export, and on top you will see the “Share” button (maybe it will be hidden under the button with three dots – it depends on the size of the screen of your device).
2) Select the format you want: CSV or BRC
3) Select the program to export. You can use the mail client, instant messengers, cloud storage (Dropbox, etc.)
Import Recorded Data
ATTENTION! Import only files in BRC format! Importing entries in CSV format is not possible!
Importing proccess is different for iOS and Android!
Import to iOS (you need a Mac or PC, iTunes):
1) Connect your iPhone / iPad to a Mac or PC and wait for it to appear in iTunes
2) Click on the connected device in iTunes and go to “Shared Files”
3) Select the program Car Scanner
4) Drag and drop the file you need into the window with the Car Scanner files in iTunes.
Read more about working with the “Shared Files” feature here: https://support.apple.com/HT201301
Import to Android:
Just click on the .BRC file (in the email application or in the file manager). Car Scanner will be launched and you can find the recording file in the Data Recording section.
Other features
By default, the files are named with the start date of the recording in the format YEAR-MONTH-DAY HOUR-MINUTE-SECOND.
You can rename them:
1) iOS: Swipe from right to left over the file you want to export, click the “More” and “Rename” buttons.
Android: Hold your finger on the file you want to export, and on top you will see the “Rename” button (maybe it will be hidden under the button with three dots – it depends on the size of the screen of your device).
2) Enter the desired file name. Please note that there are characters that cannot be in the file name!
3) Tap “OK”.
You can delete one or all entries.
Delete one record:
iOS: Swipe from right to left on the file that you want to export, click the “Delete” button, confirm the deletion.
Android: Hold your finger on the file you want to export, and you will see the “Delete” button on top (maybe it will be hidden under the button with three dots – it depends on the screen size of your device), confirm the deletion.
To delete all entries, click the trash can button and confirm deletion.
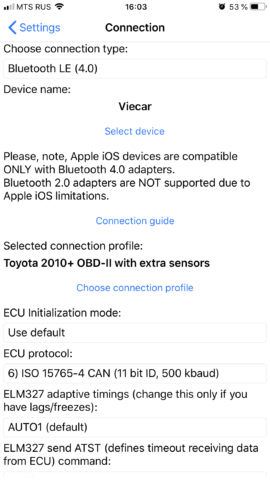 Then in the Dashboard we create a page with 4 sensors and set them up: FL wheel speed, FR wheel speed, RL wheel speed, RR wheel speed. I also make sure that the owner has data recording enabled in Car Scanner.